After filling up the bucket and letting it sit sealed for two weeks (while still regularly draining the "tea"), it was time to empty the fermented contents and mix everything with dirt.
What you need:
- A place to bury your food waste. If you have a yard, you can bury it straight in the ground.
- If you live in an apartment, like me, you can use a planter box or any large container (e.g. a Rubbermaid tub). Just make sure there are drainage holes on the bottom! If you are doing this on a patio or balcony, it would be a good idea to put a tray underneath to catch whatever drains out of those holes...
- Also, if you have no yard, you will need some dirt. I bought a bag of topsoil from Home Depot, and used about half. In the future, my gardening friend said I could take some dirt for free, and bring it back enriched :)
- A garden trowel and gloves.
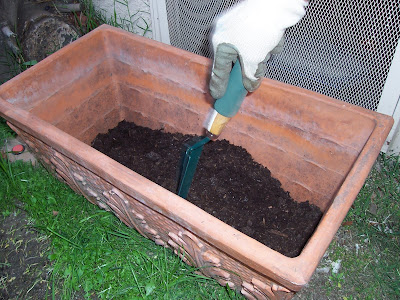
Step 1 - Spread a layer of dirt in the bottom of your planter:
Step 2 - Add a layer of fermented food waste from your Bokashi bucket - YUM!!!
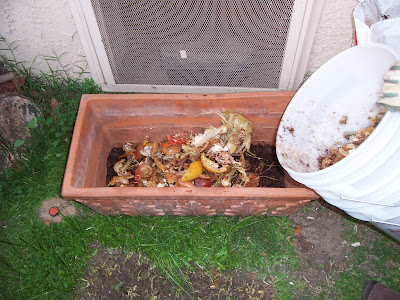
Step 3 - Continue to alternate layers of dirt and scraps. Make sure everything is mixed well. Chop up any big pieces of food, if you hadn't already cut the scraps into small pieces before adding them to the bucket. You should not be surprised if the food hasn't changed much in appearance yet:

Step 4 - Once all the food waste has been added and well-mixed in, finish with a final layer of soil:

Step 5 (Not Shown): Cover the planter with something to keep out rain. I used a large plastic trash bag and tucked the ends under the planter so it wouldn't blow away (or get yanked off by the neighborhood cats). Now let it sit for at least 4 weeks to finish decomposing. The food scraps will break down and the mixture will take on that familiar compost look.
Hint: I uncovered the planter and did some additional chopping and mixing with a trowel to help break up the stubborn bits. My compost took a total of about 6 weeks the first time before it looked done.
No comments:
Post a Comment